Showing posts with label Tutorials. Show all posts

Friday, March 9, 2012

Art Gallery {for the kiddos}

by Mollie

  Zoie, Pennie, and I go to Mommy and Me preschool and we LOVE it.  We have an incredible teacher and an amazing class.  All of the moms there are so great and it is the highlight of our week.

 Zoie always comes home with such cute artwork and I was at a loss of how/where to display it for her.  Our fridge is magnetic but its not very strong and I'm constantly knocking papers off so that option was out.  I quickly scoured Pinterest (OF COURSE) and came up with this solution...


I grabbed some cheap and easy frames from Ikea, threw some scrapbook paper in them, and hot glued a strong clip to the top.   


I put them low of the wall so they are at Zoie's eye level.  She LOVES coming home from preschool and hanging up her art on her gallery. 


She brings everyone over to her wall to explain her art work (p.s.. this one is rainbows, duh!) 


Looking forward to more of her artwork to display soon!

Blessings..


Thursday, October 13, 2011

One project down...

by Holly

O.K., so I got a little ahead of myself once the kids went back to school.  I had all these great project ideas, and none of them have gotten done... except 1.

I finally finished our "Family Rules".  YAY!!!

I kinda had to finish this one since I kept stepping over this giant canvas that has been propped up against the wall, laying under the dining table, and spread out on the family room floor.

I got my inspiration from Lindsey over at The Pleated Poppy.  I have LOVED the one she has in her house (take her home tour, you will get so many great ideas).  She ended up using fabric for hers, while I used scrapbook paper.

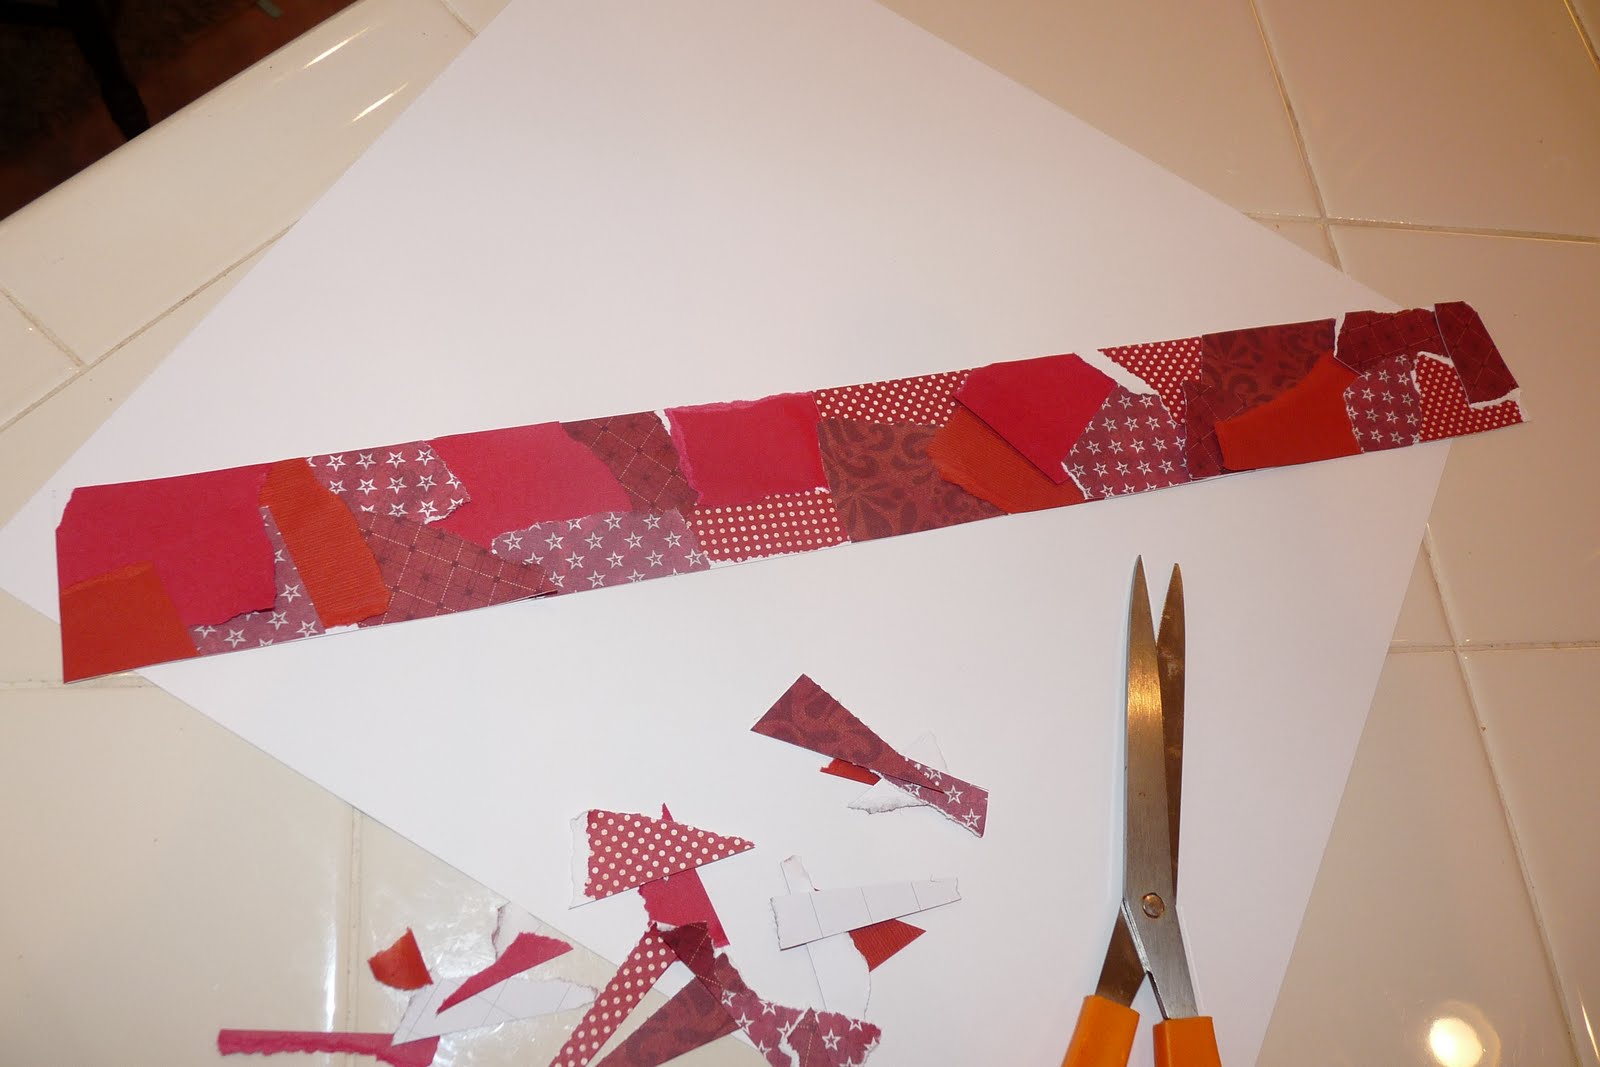
I painted the canvas a light gray first, then cut the strips of paper to size.  I wrote out each rule (I used different fonts from the computer as a guideline) with a paint pen, but you can also print them out or copy them with carbon paper.  When I was done, I used mod podge to glue the paper to the canvas and then I put a couple coats over the top to give it a nice sheen.

I LOVE it!  Here it is...
Since I live in a house with all boys, there are not many feminine touches around here.  I love all the patterned papers in soft colors.

And the best part for my family, is where it is placed in our house...
In the time out corner :)  Don't you love my model?  I asked him to make his best mad face.  This is all he could come up with.  Gotta love him!  (And no, the ruler is not part of our time out routine.  He just happened to be carrying it around with him.)

My thought is that my kids are going to become VERY familiar with these rules while their sitting in their time outs.

And it's pretty to boot.  Beautiful, simple, and practical.  All my favs!

Now, for all my other projects... (sigh)

Happy Thursday!

Monday, September 26, 2011

Fall Wreath

by Mollie

 So I have totally been swept up with the yarn wreath obsession.  I have been pinning all sorts of beautiful ones and could hardly wait to make my own. (btw... follow me on Pinterest here)

  Here are some of my current obsessions:


Source: etsy.com via Kelly on Pinterest


Aren't these just adorable?!?  Holly made a super cute one for Middle Man's Birthday party here.  So I decided to try my hand at it.


I started with a simple foam wreath and wrapped the heck out of it with yarn.  It took me almost an hour of PURE wrapping (while watching Bachelor Pad of course) to get it all covered.  I decided to wrap it completely twice to make sure I covered any holes or gaps that was left out the first time.


Then on to make the flowers.  I broke out my trusty gathering foot.  If you dont have one of these and you make a lot of ruffles...YOU NEED ONE!! 


It does this for you without ANY effort at all. Trust me...If I can do it so can you. 


Pretty pretty ruffles... I wrap this long ruffle around and sew it down on a circle piece of felt and add a decorative button in the middle.  


I made a couple more ruffle flowers and one mustard felt flower and hot glued them on.


I have to tell you.... I kind of LOVE it!


no...its NOT going to sit on my floor.  I have big plans for this little wreath but it will be revealed soon! 

Hope ya'll had a great weekend.  If you attended Blog Sugar I'm totally jealous and want to hear all about it!!

Blessings!


Thursday, July 7, 2011

Summer Staple Strawberry Freeze

by Holly

Hey everyone!  I promised that today I would post my favorite summer dessert recipe.  Now I am not a huge strawberry fan, but this dessert has the perfect amount of fruitiness combined with the easiest cookie crust you can imagine.  It is a staple in my house during the summer.  I usually make it for get togethers, and then proceed to eat all the leftovers (much to my families dismay).
I was introduced to this recipe after I had my second child.  I have pretty bad postpartum issues, and food is definitely the way I cope.  After my first son was born it was lemon cooler cake from Costco.  Second time around, strawberry freeze that was brought to us by a family in our church.  Third time around I had drugs, so I was good that time.  (Don't tell Tom Cruise)
I love this recipe (have you gotten that yet?).  Here is the finished product...
Here's what you need:
chips ahoy cookies
8 oz. cream cheese, softened
1/2 cup sugar (I actually substitute with 2 1/2 teaspoons Splenda)
12 oz. frozen berry juice concentrate
1 cup crushed strawberries
8 oz. cool whip

Start by placing the cookies in a springform pan to make the crust...
How easy is that?  And, you have some cookies left over to snack on while you make the topping.
For the topping, beat the cream cheese (fat free cream cheese works well if you are wanting to cut down a bit on fat content) and sugar in a large bowl with an electric mixer on medium speed until well blended.  Gradually add the juice concentrate, beating well after each addition.  Add the crushed strawberries.  I use a food processor to get them nice and juicy...
Add cool whip, stir with wire whisk until all blended.  Pour over cookies and freeze.
So simple, and soooo yummy!
Hope you all get a chance to make this for your family and friends this summer (or just for yourself, if you so wish:)  Enjoy!
Happy Thursday!

Friday, July 1, 2011

Flag Art

by Holly

I love the 4th of July!  Usually we are at my parents house celebrating with fireworks in the backyard (you can still do that where they live).  But, this year with gas prices so high, we decided to stay home.  Bummer!
However, there are still lots of fun things to do around here.  We are looking forward to our communities bike decorating contest, parade, and picnic which we have never been here to participate in.
I thought that today I would do a patriotic craft with the kids.  Get them talking about the 4th of July and what it means that we celebrate it.  So we ended up doing a paper project (easy for my 3 year old) that had to do with our nation's flag and involved a lot of paper tearing and glue sticks (all his favorites).
The end result is a decoupage looking flag.  Ours actually ended up looking more camouflage than decoupage.  But, hey, I've got three boys.  Whatta ya expect?

Now you can do this as small and easy, using just an 8 1/2 by 11 piece of paper.  We made ours bigger and then mounted it to a canvas that would hang on our wall (about 30" by 24").
For this project you need:

whatever size paper you want your finished flag to be
lots of red, white, and blue scrap paper for tearing
scissors
ruler
pencil
glue sticks

Using a ruler and pencil, draw out the stripes on your paper (7 red, 6 white) and blue corner square.
Kind of hard to see here, but pretty self explanatory.  Then cut out each stripe and the corner blue square.  I labeled each one on the back so it would be easy when they needed to be put back together (1R, 1W, 2R, 2W, 3R, 3W, and so on).
.
Then, let the kids go at it.  I gave each of my kids a color and they tore up the scrap paper and starting gluing.  This is great for them because it doesn't have to be perfect.  You are going to trim it all down later, so let them be creative.
I think little man was just so excited that I actually let him have a glue stick.
This part may take a while, depending on the size of your flag, so patience is key here.  Trust me!  I think my kids pooped out at about 3 stripes each, and then it became more of Momma's project.  But they got the idea, right?
Once a stripe is done, turn it over and use your scissors to trim the excess scrap paper that is hanging over the sides.
Nice and neat, and ready to be put back together again.  Turning the flag over to the back side, you can just tape the stripes back together as you go...
Like I said before, we mounted ours on an old canvas that I fully intend to use someday.  But for now...
My boys are proudly displaying their stars and stripes!  (Notice we added some simple white stars, one for each member of our family.  We did discuss that there are really 50 stars on the real flag and what they stand for, so no worries all you history teachers out there.)
Hope you all have a fabulous holiday celebrating our country!  Happy Friday!

Tuesday, October 19, 2010

Felted Flower Pillow & Zipper Tutorial

Hello All!
   Finally back into the groove of the week. It is raining cats & dogs here and it was totally inspiring to get started on some crafts and projects.  I have been really into decorating my house for fall.  I have taken 3 pillows off our couch and have made fun slipcovers for them especially for the season.  The first pillow was a polka dot pattern with a felted owl on it. You can see that project here.  This pillow was a lot more work but it ended up super cute! Because i'm impatient here are the before and after pics now!

Before:

After:
Cute huh?!?

So here's how it's done!

Supplies:
  • 1/2 yard material in color of your choice
  • 1/2 yard felt in color of your choice (you will have plenty of extra but err on the side of precaution so you can mess up if necessary!)
  • SHARP scissors
  • ruffle pattern (i free hand drew one on a large notecard and cut it out)
  • standard sewing supplies (machine, needle, thread, pins)
  • Decorative Button
  • Invisible Zipper )12-14 inches
  • Hot Glue Gun
Directions:

  1. I decided to make the decorative flower first.  I used a circle of old felt I had to glue the petals onto a base.  I drew a small petal pattern on a notecard and cut out a TON of these little suckers. Then carefully glued them onto the felt overlapping to get the flower effect. 


2.   Then I cut out the fabric into 2 identical squares.  I had a 16 by 16 pillow so I made my squares 17x17.  
3.   Then the fun part....Tracing and cutting out all those sweet little ruffles.  It was a long process. But 2 episodes of Glee and 3 of Gilmore Girls over a period of a week & it was done!


I carefully layed them all out in a pattern on one of the pieces of fabric and sewed them on.  I had to piece some together for the longer length.  I chose to do mine at an angle but any direction you choose would be great!

4.  Now for the zipper.  With the right sides together pin your fabric together on the bottom.  Place the zipper on the middle and mark the opening and closing on each side.  Sew from the end to each mark leaving a huge gap in between for the zipper.

5.  Then open up your fabric and iron the seams open as well as the fabric creating a little flap on each side. 


6.  Now you are ready to pin and sew your zipper! Pin your zipper on the tailored side of the fabric as close as possible to make it invisible.  Using the zipper foot on your machine top stitch the zipper into place!

7.  Once that is done OPEN YOUR ZIPPER!!! i cannot stress this step enough! Trust me!! OPEN YOUR ZIPPER. otherwise you will spin some time with a safety pin and a huge light cursing your stupidity (i wouldn't know ANYTHING about that)

8.  From there its simple! Put the right sides of the fabric together, pin carefully so everything matches up and sew it closed!! 

9.  Once it is right side out again I would place it on the pillow so you can get great placement on your decorative flower.  Hand sew the flower into place and Wha-La!! Beautiful Fall Pillow! 

Dont be surprised if you see a lot of pillows soon! i am trying to build up some stock for a boutique coming up in December and am really excited to get creative! Until next time...

Blessings!


The Trendy Treehouse


Make it Yours @ My Backyard Eden

Monday, October 18, 2010

Absent for Awhile & New CHRISTMAS ideas!?!?!

Hello all!
First i must apologize for being absent lately. I have been working tirelessly to clean out my garage to make a mini craft room! We own a town home so I cant make major changes. If I could you better believe I would have whipped out the paint and maybe even some drywall! i don't have any before pictures but please imagine a VERY messy garage with boxes EVERYWHERE!! Here is my enjoyable little space now!
I used some old saw horses and a door that we had removed from our house to make an EXTRA long table. This means I can have my sewing machine on one end and everything else on the other!

an OLD TV that I can play DVD's on to help pass the time away. During the day I open up the garage door and get great sunshine and a breeze to cool off and brighten up the space. 

i know it doesn't look like much but its pretty much awesome to me! With an 11 month old daughter crawling around, the fact that I can start a project and leave it (sharp scissors and all!) is so freeing!!


So on to my Christmas Ideas... I know what you are thinking. Mollie, Christmas ideas?!? really?!? its not even Halloween yet!  I know..but i LOVE LOVE LOVE Christmas and when i get going I can't stop. I love my house decorated for fall but i am practically salivating at making Christmas decorations.  This is a simple gift idea for that special friend to give them something small but meaningful or that last minute party you are invited to, or that awkward moment where someone gives you a gift and you are totally unprepared!!?  I introduce: Peppermint Hot Chocolate in a jar!

Its SUPER simple to make and everyone loves it!

Ingredients:
  • 1-quart Jar
  • 1 1/2 cups powdered nondairy creamer
  • 1/4 tsp salt
  • 1 cp nonfat dry milk powder
  • 6 tablespoons unsweetened cocoa powder
  • 1/4 cp packed brown sugar
  • 16 peppermint sticks, coarsely crushed (i used a plastic bag & a rolling pin...took care of some pent up frustration. hehe)
  • 1 cp milk chocolate chips, divided.
1.  Combine creamer and salt in a small bowl; stir well.  Combine milk powder and cocoa powder in another small bowl; stir well.  Pour 3/4 cp creamer mixture, 1/2 cp cocoa mixture, remaining creamer mixture and remaining cocoa mixture into a 1-quart wide mouth jar with tight-fitting lid.  Pack down firmly after each layer (I used the bottom of one of my spice jars)  Add granulated sugar, brown sugar, half of peppermint, 1/2 cp chocolate chips, remaining peppermint and remaining 1/2 cp chocolate chips.  Pack down firmly after each layer.  Seal jar.  

2.  Cover top with fabric or festive ribbon.  Attach a gift tag with these instructions:

  •     Pour contents of jar into large bowl; mix well. Pour mixture back into jar.
  •    For single serving place 1/4 cp cocoa mix into cup add 3/4 cp boiling water; stir until chocolate has melted and peppermint is dissolved. ( Add more boiling water to taste, if necessary) Garnish with whipped cream if desired.  Makes 16 servings. 

I like to make up a HUGE batch of these and have them ready to go when the time comes.  I normally get the jars from Michaels ($1.99 a pop).  I will be playing around with some other recipes too..cookies, soup, raisin bread. Keep logging on to get more ideas! 


mmm button


Photobucket